DIY | Felted Sweater Headband with Jenna!
Yesterday I had the good fortune of hosting the lovely Jenna Holmgren for "Take a Kid to Work Day". I have had past students join me in the classroom in years prior but this was my first time having a student come and see what life is like as a "stay at home mom/photographer/columnist/blogger".
Our morning started off how mine normally does... breakfast at the table with my littles (still in their jammies) and reading the Word. Right now we're reading through the "My First Message" that I downloaded for my Kindle and iphone. I highly recommend it!
I introduced Jenna to the wonderful world of Pinterest and had her pick a DIY project for this blog post. She has good taste and chose to make felted head bands. So - we packed up the kids and headed off to Sally Anne in search of some 100% wool sweaters. We were there before the store opened and felt really cool waiting for them to open the doors :)
We read a little tutorial on felting at The Magic Onions.
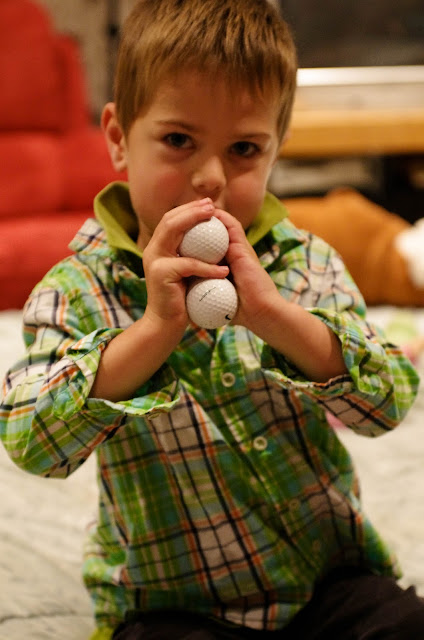
First we needed a pillow case and golf balls.
Our 100% wool sweaters!

We threw them into a pillow case and tied it up. This is to catch all the fibers that will come loose and the golf balls apparently help with the felting process. All you do next is throw it into the wash and wash with the hottest water possible. I listened for changes in the laundry cycle and before it drained and rinsed I reset the agitation phase twice more.

While we waited for the sweaters to felt I gave Jenna a quick lesson on how to use an SLR camera. Jenna learned the full joys of being a multi-tasking mom as she had to learn the camera while we played kitchen with Hanny and Sonic with Kai.
Jenna caught on to everything super quick, she's a natural. We took the kids on a little walk so she could practice and she did amazing!
Here are a couple of her shots.


I also set her up on Lightroom so she could get the feel of post processing. Here is one she processed of Hanny.

O.K. back to felting! Here are our mini sweaters! Time to cut 'em up!

I drafted us a pattern. Our template was 24 inches long, 4.5 inches at the widest part and tapered to 1.5 inches at the ends.

In order to get it symmetrical cut a 24" x 4.5" rectangle, fold it in half and then taper the ends and then cut.

Jenna wanted to use the super cute teal/gray chevron print but none of our pieces were long enough to do the entire length. Instead we cut the middle (front) section from the chevron and then cut matching end pieces from the gray sewed them all together.

Next she cut out irregular flower shapes and stacked them for embellishments. She made two flowers (one larger) and sewed them on with yellow embroidery thread (to match the gold button she used on the back) in an "X". They are darling.
For a closure all you need to do is fit the headband and mark where you want the button. Sew it on. Then draw a box where the button hole should be and sew around in a zig zag stitch and then cut a slit down the middle. I've never done a button hole before but it was easy peasy.

I adore how it turned out! Great job Jenna!!! We headed outside to do a mini shoot of her creation.

How stunning is she?

Love the detail. It all looks so great!

Thanks for spending the day with me and the kids Jenna - we had a blast! Also, stay tuned as Jenna will also become a published author next week as she is writing my ifamily column for me!
Our morning started off how mine normally does... breakfast at the table with my littles (still in their jammies) and reading the Word. Right now we're reading through the "My First Message" that I downloaded for my Kindle and iphone. I highly recommend it!
I introduced Jenna to the wonderful world of Pinterest and had her pick a DIY project for this blog post. She has good taste and chose to make felted head bands. So - we packed up the kids and headed off to Sally Anne in search of some 100% wool sweaters. We were there before the store opened and felt really cool waiting for them to open the doors :)
We read a little tutorial on felting at The Magic Onions.
First we needed a pillow case and golf balls.

Our 100% wool sweaters!

We threw them into a pillow case and tied it up. This is to catch all the fibers that will come loose and the golf balls apparently help with the felting process. All you do next is throw it into the wash and wash with the hottest water possible. I listened for changes in the laundry cycle and before it drained and rinsed I reset the agitation phase twice more.

While we waited for the sweaters to felt I gave Jenna a quick lesson on how to use an SLR camera. Jenna learned the full joys of being a multi-tasking mom as she had to learn the camera while we played kitchen with Hanny and Sonic with Kai.
Jenna caught on to everything super quick, she's a natural. We took the kids on a little walk so she could practice and she did amazing!
Here are a couple of her shots.


I also set her up on Lightroom so she could get the feel of post processing. Here is one she processed of Hanny.

O.K. back to felting! Here are our mini sweaters! Time to cut 'em up!

I drafted us a pattern. Our template was 24 inches long, 4.5 inches at the widest part and tapered to 1.5 inches at the ends.

In order to get it symmetrical cut a 24" x 4.5" rectangle, fold it in half and then taper the ends and then cut.

Jenna wanted to use the super cute teal/gray chevron print but none of our pieces were long enough to do the entire length. Instead we cut the middle (front) section from the chevron and then cut matching end pieces from the gray sewed them all together.

Next she cut out irregular flower shapes and stacked them for embellishments. She made two flowers (one larger) and sewed them on with yellow embroidery thread (to match the gold button she used on the back) in an "X". They are darling.
For a closure all you need to do is fit the headband and mark where you want the button. Sew it on. Then draw a box where the button hole should be and sew around in a zig zag stitch and then cut a slit down the middle. I've never done a button hole before but it was easy peasy.

I adore how it turned out! Great job Jenna!!! We headed outside to do a mini shoot of her creation.

How stunning is she?

Love the detail. It all looks so great!

Thanks for spending the day with me and the kids Jenna - we had a blast! Also, stay tuned as Jenna will also become a published author next week as she is writing my ifamily column for me!
Comments
Post a Comment