DIY: Making Annual Photo Books Manageable
Being a photographer I have literally thousands of personal pictures stored on my hard-drive each year. Though I use them a lot on Facebook and on the blog, probably less than 1% are ever printed. That made me a little sad. I've always intended on creating photobooks from these pictures but to be frank the task seemed ridiculously overwhelming.
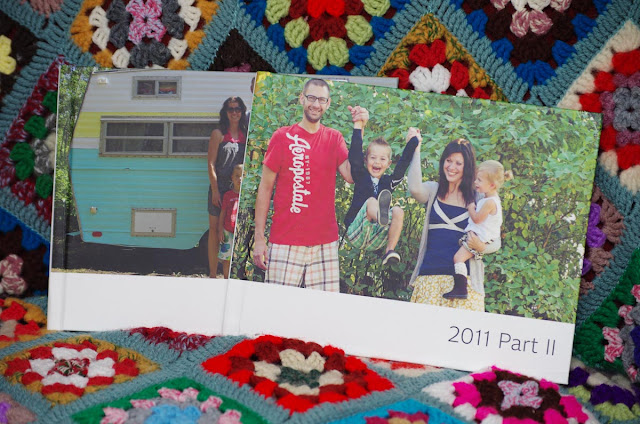
However, in attempt to embrace my "mantra" if you can call that, from the last few years, "something is better than nothing," I decided to start with current life and make a book (set of books) for 2011. The OCD me wanted to go back at least until the birth of our first child but I gave myself grace to get there in time but to at least just start with this most recent year.
I used My Publisher (and I'll share more about them later) but I am absolutely thrilled with the results!
In case you'd like to tackle your own project I'll share my process and tips.
Getting Started:
If you don't already, try to arrange your photos into folders by month or at least in chronological order. I use Lightroom for business and personal and so all photos taken in a certain month get uploaded into a file marked "January 2011 Personal" and so on. It makes it much easier to find them even if there are 400 images in a folder.
Next you need to select which pictures you'll include in your book. I would look at each picture in the month's folder and rate every picture I wanted to use with one star. If your editing program has any other way of flagging a picture you can do that as well. Then once I had them all flagged I selected them and exported them to a file on my desktop for just that month. I obviously did this for each month.
Once you've selected your pictures you've made a huge step!
Creating the Book:
I tried out My Publisher based on the recommendation from Ashley Anne from Under the Sycamore. I fully recommend them as well.
What I loved initially is that you actually download the My Publisher application to your computer and it was able to access all of my images without uploading them to an external website which meant that I could use them right away.
To keep it manageable I would only drag and drop one month folder of photos into the program at a time and finish all the pages for that month before I moved on.
In effort to keep it simple I chose a classic theme with just nice white pages and no text. I would look at my pictures, decide how many I wanted on a page and then search for a template that suited it. I also liked that I had the option to create my own image boxes and layout if none of theirs fit the pictures I wanted together.

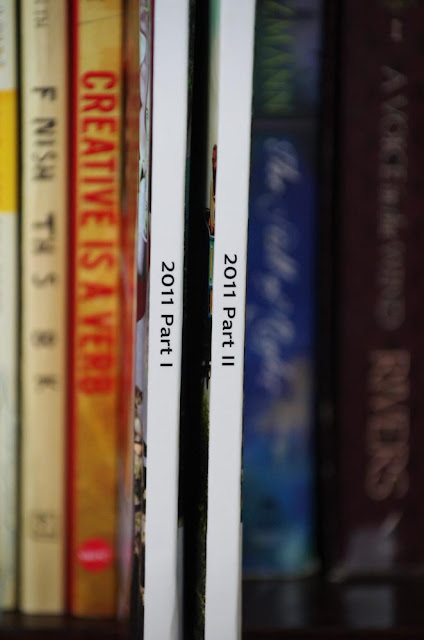
Being that I ended up with 180 pages between two books (each holds a max of 100 pages) it could end up being quite costly. Companies like this though have really great and quite frequent promotions.
I had 3 months left to complete when I received an email offering "All Extra Pages Free". That meant I would only pay the flat rate of $35 for a 20 page book and all of my extra pages were free. Considering I had 140 extra pages that was the most. amazing. deal. ever. I kicked it into high gear and finished my remaining months just in time to take advantage of the offer! Woot woot!

I think the wisest idea is to create your photo book and have it ready to print and then wait for a great offer to come along rather than pay full price. There are loads of buy one get one free or 50% off. Just be patient.
When you're ready to print you'll need to upload your entire book then to their website. This can take a while, especially if you're me and didn't read their size recommendations and used images that were probably 20x the size necessary for even full page pictures. Ooops.
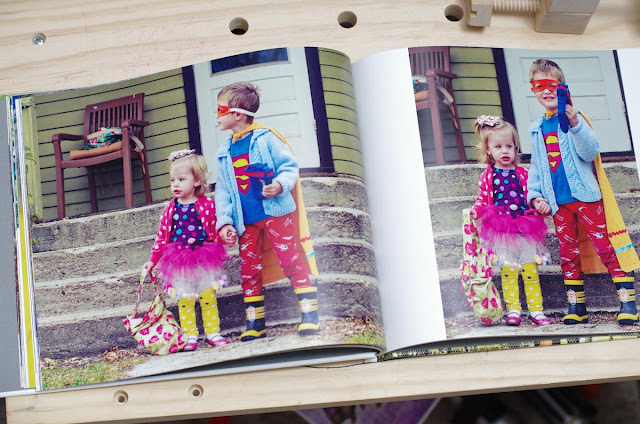
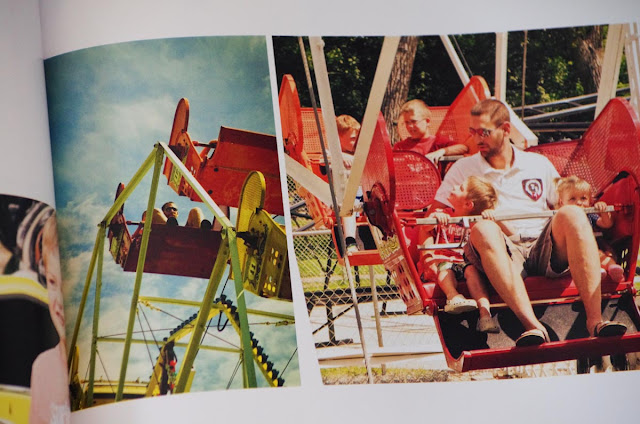
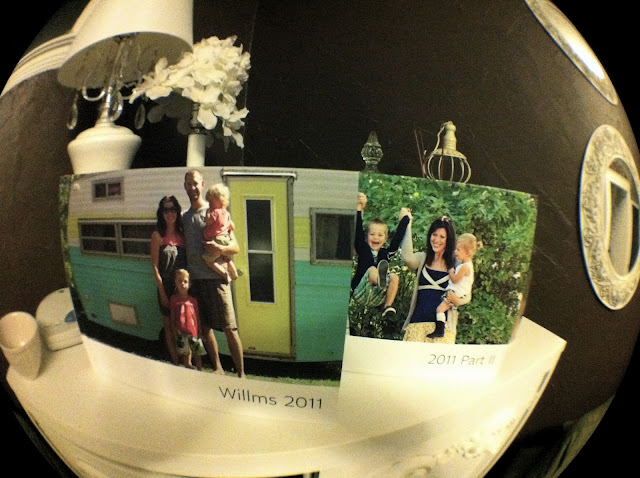
I'm so happy with these books. The quality is fantastic. So much better than the few Snapfish books I've created. I love them and am so excited for the library we'll have after a few years. As a friend jested on Facebook that I had received my "Willms Encyclopedia of Living Series". It's such a great name I may have to use it on next year's book!
And for a little randomness... here are my littles cuddling after looking at the books watching "'Spicable Me".

Have a great week!
However, in attempt to embrace my "mantra" if you can call that, from the last few years, "something is better than nothing," I decided to start with current life and make a book (set of books) for 2011. The OCD me wanted to go back at least until the birth of our first child but I gave myself grace to get there in time but to at least just start with this most recent year.

I used My Publisher (and I'll share more about them later) but I am absolutely thrilled with the results!
In case you'd like to tackle your own project I'll share my process and tips.
Getting Started:
If you don't already, try to arrange your photos into folders by month or at least in chronological order. I use Lightroom for business and personal and so all photos taken in a certain month get uploaded into a file marked "January 2011 Personal" and so on. It makes it much easier to find them even if there are 400 images in a folder.
Next you need to select which pictures you'll include in your book. I would look at each picture in the month's folder and rate every picture I wanted to use with one star. If your editing program has any other way of flagging a picture you can do that as well. Then once I had them all flagged I selected them and exported them to a file on my desktop for just that month. I obviously did this for each month.

Once you've selected your pictures you've made a huge step!
Creating the Book:
I tried out My Publisher based on the recommendation from Ashley Anne from Under the Sycamore. I fully recommend them as well.
What I loved initially is that you actually download the My Publisher application to your computer and it was able to access all of my images without uploading them to an external website which meant that I could use them right away.
To keep it manageable I would only drag and drop one month folder of photos into the program at a time and finish all the pages for that month before I moved on.
In effort to keep it simple I chose a classic theme with just nice white pages and no text. I would look at my pictures, decide how many I wanted on a page and then search for a template that suited it. I also liked that I had the option to create my own image boxes and layout if none of theirs fit the pictures I wanted together.

Being that I ended up with 180 pages between two books (each holds a max of 100 pages) it could end up being quite costly. Companies like this though have really great and quite frequent promotions.
I had 3 months left to complete when I received an email offering "All Extra Pages Free". That meant I would only pay the flat rate of $35 for a 20 page book and all of my extra pages were free. Considering I had 140 extra pages that was the most. amazing. deal. ever. I kicked it into high gear and finished my remaining months just in time to take advantage of the offer! Woot woot!

I think the wisest idea is to create your photo book and have it ready to print and then wait for a great offer to come along rather than pay full price. There are loads of buy one get one free or 50% off. Just be patient.
When you're ready to print you'll need to upload your entire book then to their website. This can take a while, especially if you're me and didn't read their size recommendations and used images that were probably 20x the size necessary for even full page pictures. Ooops.

I really would like to have books printed from the several years prior as well and so I'll slowly work on them and have them ready to print. It's also my goal to start on this year's photo books by creating pages at the end of each month or two so that by the end of the year it's all completed. We'll see how that goes.

I'm so happy with these books. The quality is fantastic. So much better than the few Snapfish books I've created. I love them and am so excited for the library we'll have after a few years. As a friend jested on Facebook that I had received my "Willms Encyclopedia of Living Series". It's such a great name I may have to use it on next year's book!


Have a great week!
Hi! I found you through another blog... and then I was reading one of your tutorials, and you mentioned buying something at the Minot Walmart... and I was flabbergasted! You're from my hometown! How cool... Anyway, great blog, awesome tutorials, and thanks for the tip about mypublisher deals. :-) I'll be keeping that in mind for when my own baby girl finally gets here (any day now, really...)
ReplyDeleteHi - welcome here! We're actually from Estevan, Saskatchewan but come down to Minot whenever we can! We love it there!
DeleteThat’s a nice photobook! The shots are great, and it’s quite obvious that you used a quality printer and paper for this. Talk about the perks of being a professional photographer, and having the means to create a beautiful page. Anyways, I would love to see more of your work in the future. Cheers!
ReplyDeleteFaye Fowler @ Master Copy & Print