RV Makeover | Introducing Hazel

Thank you so much to everyone who has left such encouraging words about our newly renovated trailer - Hazel! While I get tired of painting very quickly I really do love the design process that goes into creating a space like this. Our last trailer was a 1971, 18 foot Triple E named Elsie and we made so many great memories in her. She was bright and bold and a lot of fun. Hazel will hopefully take us on much longer journeys and so I wanted her to be an extension of our home that we can take with us.
I've been asked so many questions and I want to cover as much as the process as I can in one post so strap in! lol.


Hazel is a 2004 R-Vision Max Lite. To be honest, I've been in a lot of campers (my brother buys and sells campers and my parents and him and his wife had a trailer rental business so we've seen a lot) and I've never come across one of these! But, we had been casually searching for a very specific layout for several years and had a list of must haves and this girl fit the bill!
OUR LIST:
- Most importantly - there could be no wall at the end of the bed at all. My husband is 6'6', he does not fit if there is a wall.
- Bunks - I don't want to have make and tear down beds every day. We wanted double on the bottom for our sure to be very tall son but didn't get it.
- Streamline Kitchen - I really didn't want a cabinet layout where it juts out with a bit of a peninsula. I find it eats up space and I don't love the flow.
- A Slide
- Fiberglass siding - weight, look, durability.
- Bumper Pull - We travel with things like Kayaks, Paddle Boards, bikes, etc and didn't want to eat up truck space with a fifth wheel hitch.
- The right price - I knew I was going to be ripping most of the furniture out and painting everything so I didn't want to pay for a really new camper only to discard half of it.
It's not a crazy picky list but you'd be surprised at how hard it is to check the first item off the list. Most layouts all have a wall at the end of the bed or the bed runs across the width of the camper.

The first thing I did was rip out (aka carefully remove) all of the valances and blinds. They were fairly neutral as campers go but still ugly. The blinds were silver and pink - score! Ha.
After the window treatments I got rid of the couch and the dinette booth. There were a lot of screws and an electrical outlet that was run through the one dinette bench.

Once the furniture was out I could rip out all of the carpet. Good riddance! I don't care how clean someone is, I can't handle other people's carpet lol. Pretty sure the manufacturer used 17 staples per square inch - oi. I was so excited when I found that the wood look lino also ran under the carpet in the bedroom and that I wouldn't have to redo that flooring as well.


PAINT:
I have a lot of white walls in my life and so I actually had quite a bit of paint on hand and used that. I might have chosen other paint if I was buying but I'm not sure ;).
Walls - I primed the walls with the Beauti-Tone Acryl-lok Primer Sealer (for blocking stains) from Home Hardware. It worked fine but needed at least 2 coats.
I then painted with the Beauti-Tone Signature Series Semi-Gloss in whatever white is their standard white lol. I can't find the name! Sorry! It's a true, bright white (no yellow tones) and I use it absolutely everywhere.

As you can see the cabinets were already white. They were an off white though and quite warm compared to the wall colour I chose. They were also a weird vinyl wrap that made them that colour (rather than a paint). I couldn't sand it and wasn't sure what paint would be best but after talking with the paint expert at Home Hardware she said I would be fine to keep going with the primer I was already using so I did! (It's linked above).
Cabinets
Paint: Beauti-Tone Designer Series Furniture and Cabinet Paint (in the same white as the walls).
I found this paint to be a bit sticky and hard to work with but I rolled with it because I had so much of it from another project. I mostly used a brush and the finish looks great though. Hardware: Goldenwarm Brushed Brass T-Bar Handles

Backsplash - Obviously in a trailer you're dealing with not being heated all year (we have -40 - -60 temps in winter) and it's moving so ceramic tile isn't an option. I used these Tic Tac Tiles - Subway Mono White. Order more than you calculate you'll need due to discards and matching up the pattern.
They are SUPER sticky! So make sure you've got it in the right place before you stick them on. Also, getting around those curved windows is a beast. Leave yourself a decent chunk of time for this project. I'd say that little space took me around 6 hours!

In the bedroom all of the carpet was torn out and I wanted to do headboard feature with some faux shiplap.

I use shiplap A LOT! I have a 105 year old house and I can get away with it ;).
Here's my "recipe" for DIY Shiplap
- Use either 1/4" GOS (good one side) plywood or 3/8" underlayment (it is good on both sides). I have not yet found underlayment in Canada and so I go down to the states to get mine at Home Depot. A sheet of plywood in Canada is going to run approximately $45, this underlayment is $13 a sheet. Even with 35% exchange it's still worth it for me to make the trip to buy it (and I get to go to Target so win win).
- Then you can either rip it down yourself or have them cut it for you at the store. They have a nice big saw so I get them to cut it.
- Ask them to make 6 cuts at 7 7/8" widths (you want 8" shiplap essentially but you need to account for the blade width so that you don't end up with a really short board at the end.
- To install you can use a dime to create an even gap but I just eyeball it. Make sure you use a level on your first row so that you don't end up with a crooked wall.
- Use a chop saw to cut your pieces to length
- I attach using an air nailer. Some people use glue but I'm not up for that kind of commitment.


I love the bedding I found and even bought a king sized version for our master bedroom at home. It'll be our summer bedding. I found it at Walmart in the US and it was the Textured Stripe Comforter Set from Better Homes and Garden Line.
The curtain below is actually a shower curtain that is also from the Walmart Better Homes and Garden line. I feel like if you have a renovated trailer in 2019 you have this curtain somewhere. Seriously! I've seen it in SO many instragram posts!
The picture is a vintage print that I painted "yay" on years ago before I got my Silhouette ;) .


Over on the slide, once that horrendous carpet was out I wanted to put a fun tile in that space to bring some more design and texture. I used these black and white Peel and Stick Tiles and I love them!
It's actually hard to find this pattern right now in stock anywhere and was a little tricky even when I bought them. I got them from Lowes.ca. Here is a link on Amazon but they are ridiculously over priced.
When you install onto wood it has to be a primed surface to ensure adhesion. I've found these quite easy to install and they are easy to cut. If you have them too close to the wall (or in my case the kick plate) it can cause buckling. When we attached the kick plate a few tiles had a tiny overhang and buckled so I had to trim them to fit.
For the kick plate, I removed what had been there (very think plywood) and installed 1x10's that I stained. I used two stains to try and match the linoleum (Early American and something that was more of a cedar colour - the name was worn off). Again, I used what I had on hand!

We aren't planning on travelling with extra people and so we don't need the extra beds that both the couch and dinette turned into. I think adding your own furniture is one of the best ways to customize your space.
The couch is one of my favourite things in the camper. I adore that camel colour. It took me a lot of internet browsing to find a camel coloured small sofa at a reasonable price. Again... it was a Walmart.com purchase. I don't think they carry it in stores but I was able to get it online. It's currently out of stock and the one linked wasn't the brand I got but it's pretty close.

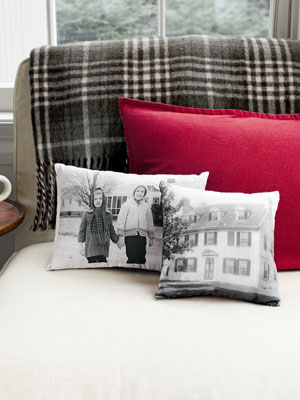
The pillows were all Walmart as well! I never shop this much at Walmart but they had everything I was looking for! None of the pillows are currently in stock but there are other cute ones if you search for "fringe pillow" and "tribal pillow".

By the time I got to the dining furniture I was getting a little tired of spending lol. I really wanted a cute drop leaf table and so I kept posting on garage sale sites and finally someone messaged me with one! I paid $17.50 for it and painted the legs a matte black. The top was somewhat damaged so I gave it a really good sand (even though it was just a veneer) and stained it. I honestly didn't expect it to work but it totally did! Yay! I think it's perfect for the space.
The chairs are our old kitchen chairs. Most of them had cracks and rather than buy new right now we attempted a superglue mixed with baking soda crack filler. We'll see how they hold up with some use. Really I think we'll be eating outside the majority of our travels but it's nice to have something for a rainy day.

I really wish I could fill Hazel with real plants but we'll be crossing the border several times and I'm not allowed to bring dirt or plants across the border so for now it's just faux greenery. I found the bamboo utensils at No Frills and added some charcuterie boards from my house stash to the camper.

I really can't stop buying all the baskets. The ones on the walls are thrifted from the Salvation Army (I like to do a 5 min walk through each week to look for things on my list).
The large basket is from Superstore as is the belly basket. The large basket holds all of my wall hangings when we travel and I'm sure we'll find a use for it while camping (maybe all of our flip flops will go in there).
THE BUNKS
Tight space = not fun to paint. My good friend Nicoline spent almost a whole week of afternoons coming and helping me paint and install shiplap. It was so nice to speed that process along and to have company while I worked!

The wall was an impromptu decision and it'll only take me 10 minutes to do again with another paint if it doesn't hold up so I went with it. But don't buy that paint.


The kids bedding are duvet covers from the Opal House Line at Target. They are an Ikat pattern and the tiered tassels on the corners are so adorable!

Lastly... the bathroom! Not a huge turn around in here. Everything was painted white. I left the mirror on for now and painted it black. I was going to go with the subway tile around the backsplash but now I think I'll use the floor tile to add a bit more texture in that space. I also need a new shower curtain because I used the other one as the room divider for the master ;) So it's not 100% done but I might just finish it on the road.


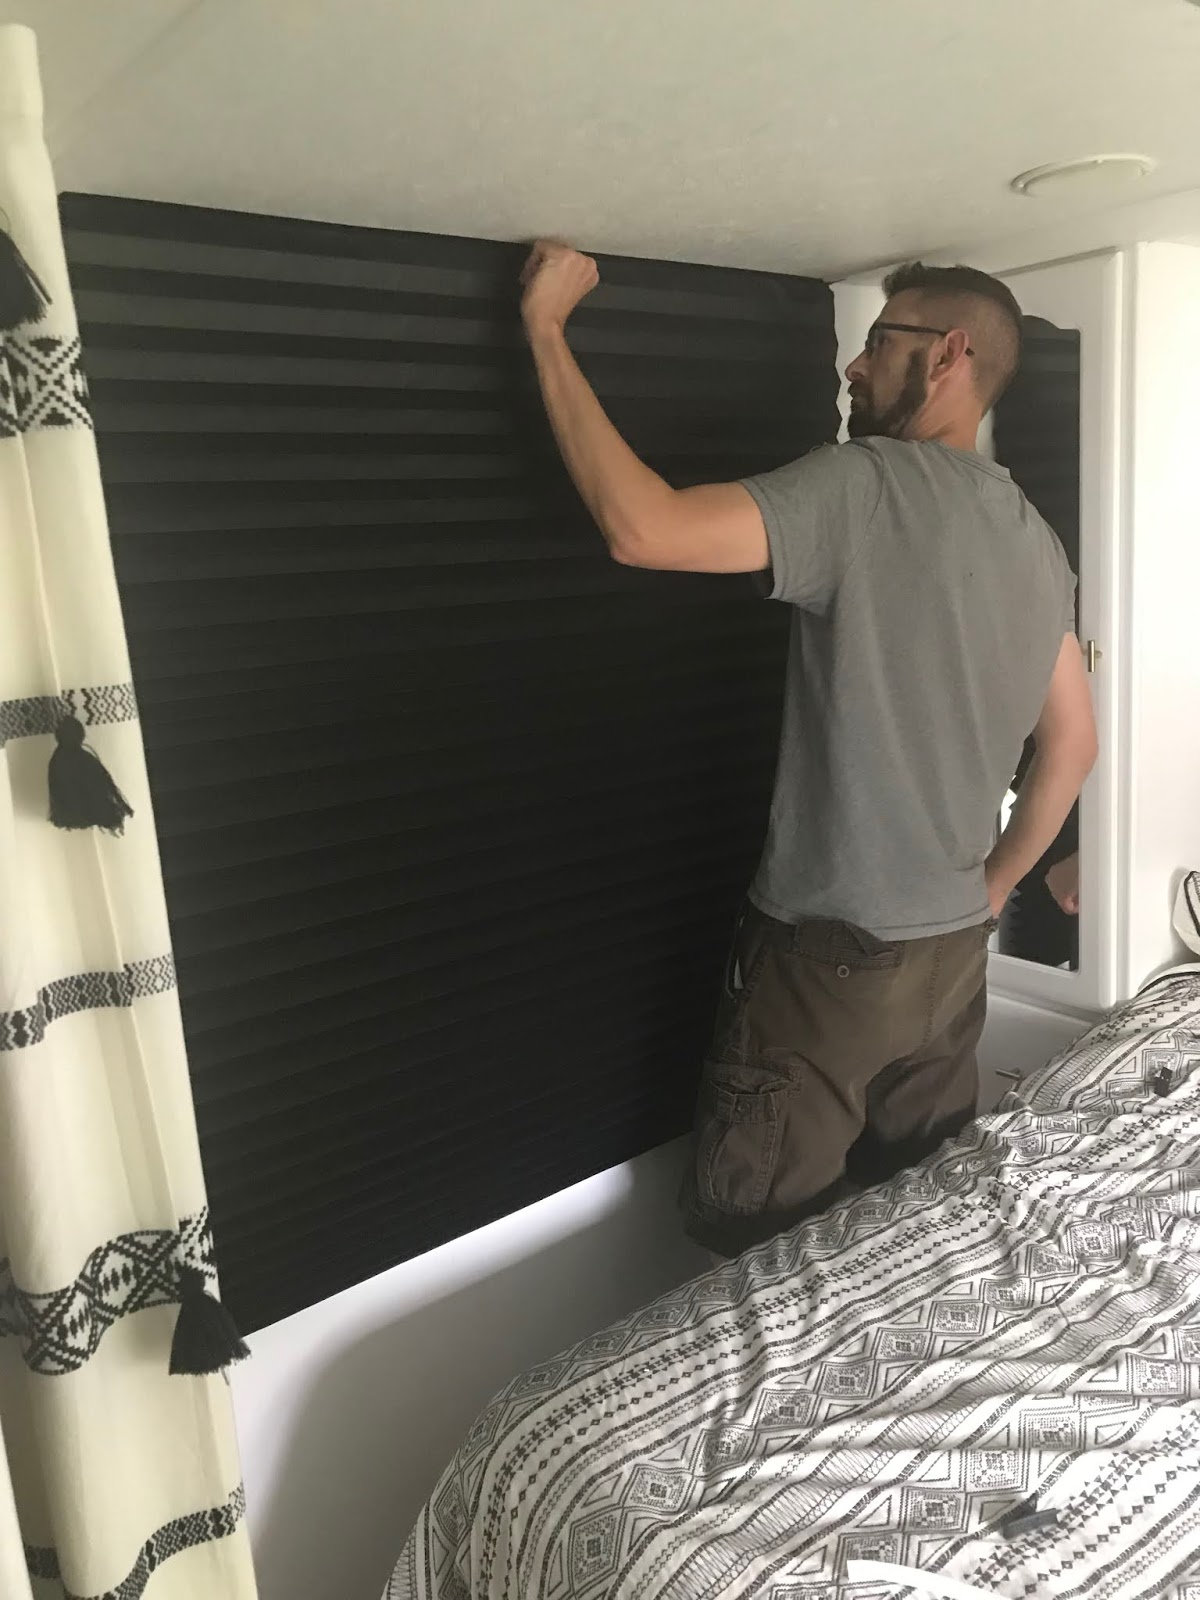
** Window Coverings** - At this point I really like the open look and don't want to hang anything. That said we obviously need shades for the bedrooms. I chose to go with black out paper shades that stick to the window well (in our case ceiling) and they just are held open by clips. They're working pretty good so far and don't attract your eye. They are from Walmart Canada.
I also have some lace panels that I intend to tack up if we're spending an evening in the trailer and feel we need the added privacy. I'm not ready to commit to window treatments just yet so we'll see how it goes!

I think that's most everything! If you want to see more pictures and follow our adventures as we take Hazel out (first trip is 3 weeks in Montana) you can look me up on Instagram @monique.willms
If you have any questions that is also the best place to ask as I don't check for comments on the blog much!
Thanks for stopping by and checking out Hazel! I'll also be using the sweet hashtags my friend (Bolan) came up with #haulinhazel and #sweethomehazel for all of her adventures :)
This looks amazing, thanks for sharing this information with us. Be sure to check the link below, really helpful for someone planning to open a business.
ReplyDeletebuy logo design
this is an awesome & great blog ever I say thanks for sharing it with us...
ReplyDeletewe surely can help you if you have an interest in web designing or logo designing then visit us?
Logo Designers
We understand our clients, and we know that they need only elite Hot and Sexy Call Girls in Chanakyapuri.
ReplyDeleteIf you have desires and fantasises that never came true, then you are in for a treat. Hiring an Busty Call Girls in Goa will give you the chance to enjoy a lot.
Our super hot Busty Call Girls in Goa are meant for providing best pleasures.
Just call us on the given numbers and we bet that you are going to enjoy with Top Call Girls in Agra.
There are lots of Top Call Girls in Agra available for you. We have lots of variety to offer too.
You can get Top Call Girls in Ajmer, Bengali, Bihari, Punjabi, Latin, Russian, and lots more. Variety is key to us because clients prefer changes in their life.
nice
ReplyDeletepitbull puppies for sale
pitbulls for sale
pitbulls for sale
Glock 17 for sale cheap online without License overnight delivery (glockgunstore.com)
glock 30 for sale
glock gun store
beretta 92fs for sale
sig sauer p938 for sale
happy birthday png
ReplyDeleteBirthday wishes for jiju
ReplyDeleteI was very impressed by this post, this site has always been pleasant news. Thank you very much for such an interesting post. Keep working, fantastic job!
ReplyDeleteLaw Coursework Help
Liquid castile soap is an ancient Spanish recipe for soft and natural soap reinvented by Vedi. Anyone with sensitive skin can use it regularly.
ReplyDeleteVery interesting blog. I enjoyed reading it. Thank you.
ReplyDeleteTop MBA Colleges in Coimbatore
Best MCA colleges in Coimbatore
ME VLSI Design Colleges in Tamilnadu
I always wanted RV. This article gives so much information. Pleasantly and best smelling laundry will make it more relaxing and pleasant.
ReplyDeleteYes, I think for certain extent they do, however I like the way you express your thoughts, keep up the good work!
ReplyDelete스포츠토토
Wood flooring will be best for your RV makeovers. Epoxy Flooring Jacksonville FL will transform your dusty floors.
ReplyDeleteNice post visit us
ReplyDeletev panel roofing service
rv cover installation Service
The artistry of Luxury and elegance with the most premium and VIP model girl in Delhi Sara Mittal. This Independent girl invites the elite to savor the luxury girl services for high profile people.
ReplyDeleteDelhi Girls
Model Girls Delhi
Mahipalpur Girls
Elite Girls Delhi
Gurgaon Girls
Noida Girls
Mumbai Girls