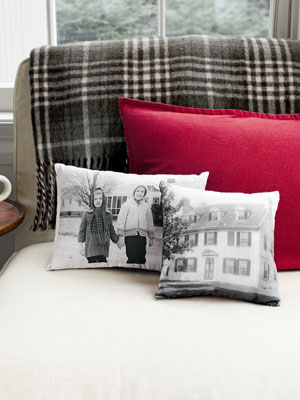
DIY | Customizing a Photo Wall
This week I finally took the time to refinish the roll top secretary desk we scored at a garage sale in the spring. I absolutely love how it turned out and am excited to share pictures! Replacing the low profile writers desk with the higher secretary desk has meant that my photo wall above the desk now needs to be rearranged as a few of the pics were lower than the top of the desk.
I've decided to add a few more pieces and take up most of the wall and so begins the "what shall I frame..." conundrum. Being that I'm a photographer and a DIYer it is important to me that a good portion of the work be my own. I also like to mix it up a bit and add some personalized typography prints.
As I'm going through my selection process I figured I'd share a few tips on personalizing your own photo walls in your home.
I'm daily amused by the things that come out of my toddler's mouth and so last year I decided to create a typography print out of one his cute sayings. I may be an English teacher but I love the way the boy one mispronounces some of his words. Some of his most current are:
"Winkles" = wink
"lishkish" = licorice
"copcorn" = popcorn
"tiger" = tire
"straight lions" = straight lines
and his ultimate that we will never change... "Chochi Milk".
He used to call strawberries, "strawbrobbies" and so I thought it'd make a cute kitchen print that said "I like strawbrobbies!" I used photoshop elements and even if you don't have it now you can download the whole program as a 30 day free trial here. Super handy!

Start by creating a file the actual size you want your print to be. For me it was 16x20.
Choose white background when making your new project and then change the background colour to the one you want. Mine was red.
Select the font you like and then insert your text. I recommend doing each word as a separate insert so you can move it around as you like. You can install free fonts on your computer from dafont.com.
Pick a graphic if you like and add it. I somehow selected all the lines on the strawberry and changed them to white while leaving the rest transparent so that it would show the background colour through it. For the life of me I can not remember how I did it!
Now all you have to do is save it as a jpg and send it to your nearest photo developer to print! Because it's like a poster i did inquire with a local sign show on printing it there but it was quadruple the price of developing it as a picture.
It's still hanging in my kitchen and it makes us all smile :)


Adding the text to this took all of 3 minutes. Open the jpg in photoshop, insert your text over the pic and then save as a jpg.
While I'm still figuring out a few more of the family pics and individuals of the kids I want framed I think I also want to attempt a little embroidery hoop art in a style like Dottie Angel (below).

I'm getting excited! Hopefully I can get it done quickly and post some pics!
I've decided to add a few more pieces and take up most of the wall and so begins the "what shall I frame..." conundrum. Being that I'm a photographer and a DIYer it is important to me that a good portion of the work be my own. I also like to mix it up a bit and add some personalized typography prints.
As I'm going through my selection process I figured I'd share a few tips on personalizing your own photo walls in your home.
I'm daily amused by the things that come out of my toddler's mouth and so last year I decided to create a typography print out of one his cute sayings. I may be an English teacher but I love the way the boy one mispronounces some of his words. Some of his most current are:
"Winkles" = wink
"lishkish" = licorice
"copcorn" = popcorn
"tiger" = tire
"straight lions" = straight lines
and his ultimate that we will never change... "Chochi Milk".
He used to call strawberries, "strawbrobbies" and so I thought it'd make a cute kitchen print that said "I like strawbrobbies!" I used photoshop elements and even if you don't have it now you can download the whole program as a 30 day free trial here. Super handy!

Start by creating a file the actual size you want your print to be. For me it was 16x20.
Choose white background when making your new project and then change the background colour to the one you want. Mine was red.
Select the font you like and then insert your text. I recommend doing each word as a separate insert so you can move it around as you like. You can install free fonts on your computer from dafont.com.
Pick a graphic if you like and add it. I somehow selected all the lines on the strawberry and changed them to white while leaving the rest transparent so that it would show the background colour through it. For the life of me I can not remember how I did it!
Now all you have to do is save it as a jpg and send it to your nearest photo developer to print! Because it's like a poster i did inquire with a local sign show on printing it there but it was quadruple the price of developing it as a picture.
It's still hanging in my kitchen and it makes us all smile :)

After finally going through my pictures I have decided to frame this one as an 11x14 in the living room. I had seen the quote on a picture on pinterest and fell in love with it. It's so true, they are my greatest adventure. I absolutely adore what this photo represents about their relationship.

Adding the text to this took all of 3 minutes. Open the jpg in photoshop, insert your text over the pic and then save as a jpg.
While I'm still figuring out a few more of the family pics and individuals of the kids I want framed I think I also want to attempt a little embroidery hoop art in a style like Dottie Angel (below).

I'm getting excited! Hopefully I can get it done quickly and post some pics!
Comments
Post a Comment